Quickstart
The quickest way to try out GoRules.
Access GoRules BRMS
GoRules BRMS can be accessed by two different methods:
- Through GoRules BRMS Cloud Demo - Quickest way
- Through Self-hosted instance
If you already have your environment set-up feel free to skip this section.
BRMS Cloud is not intended to be used in a product environments. It is used for evaluation purposes only. Once you are ready, a developer should follow deployment instructions.
Signing up
Process of getting started with Cloud BRMS is simple and straight forward.
- Go to GoRules Cloud And Sign Up
- Follow the instructions to log in
- Create your organisation and open it
Create a project
Projects are workspaces for your organisation. They enable you to achieve better decoupling between teams. Each team can manage their own projects and have ownership of their work.
Log in to GoRules. You should land on the dashboard which contains a list of projects.
Create a project by clicking on the Create project button and filling in the details.
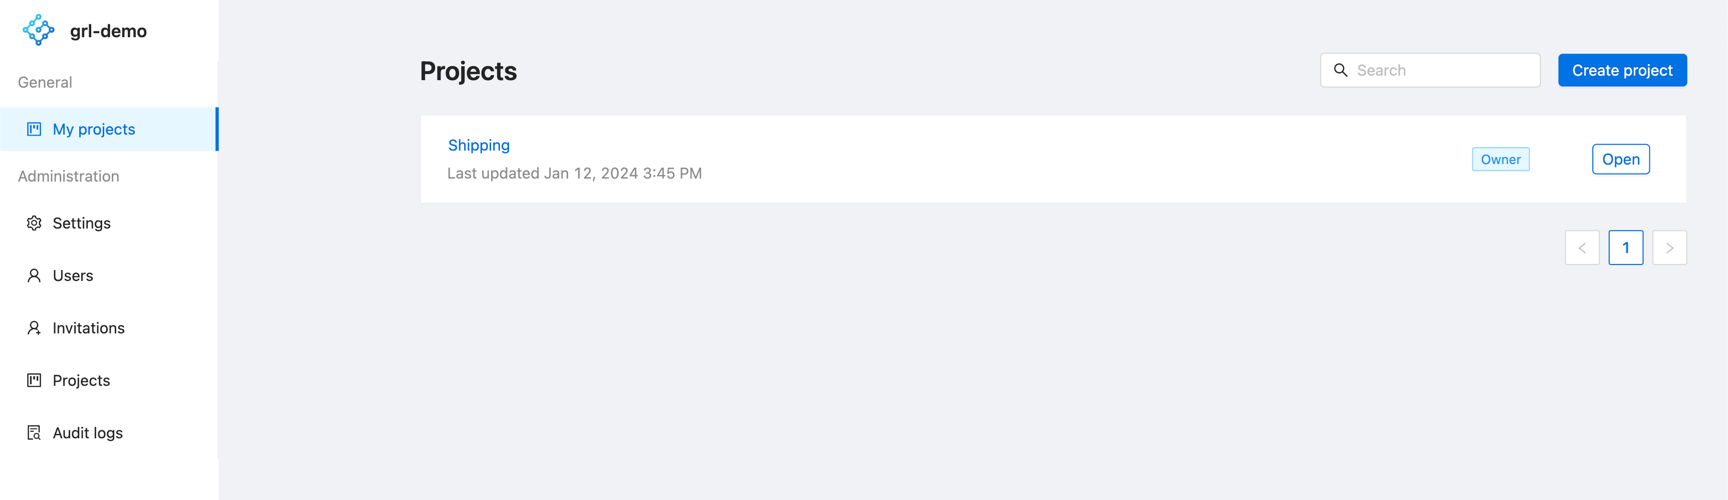
You can now open the newly created project to access the documents and other project related resources.
Create a decision
Decisions are graph based structures which allow you to compose multiple nodes.
From the documents, create a decision and name it Shipping decision.
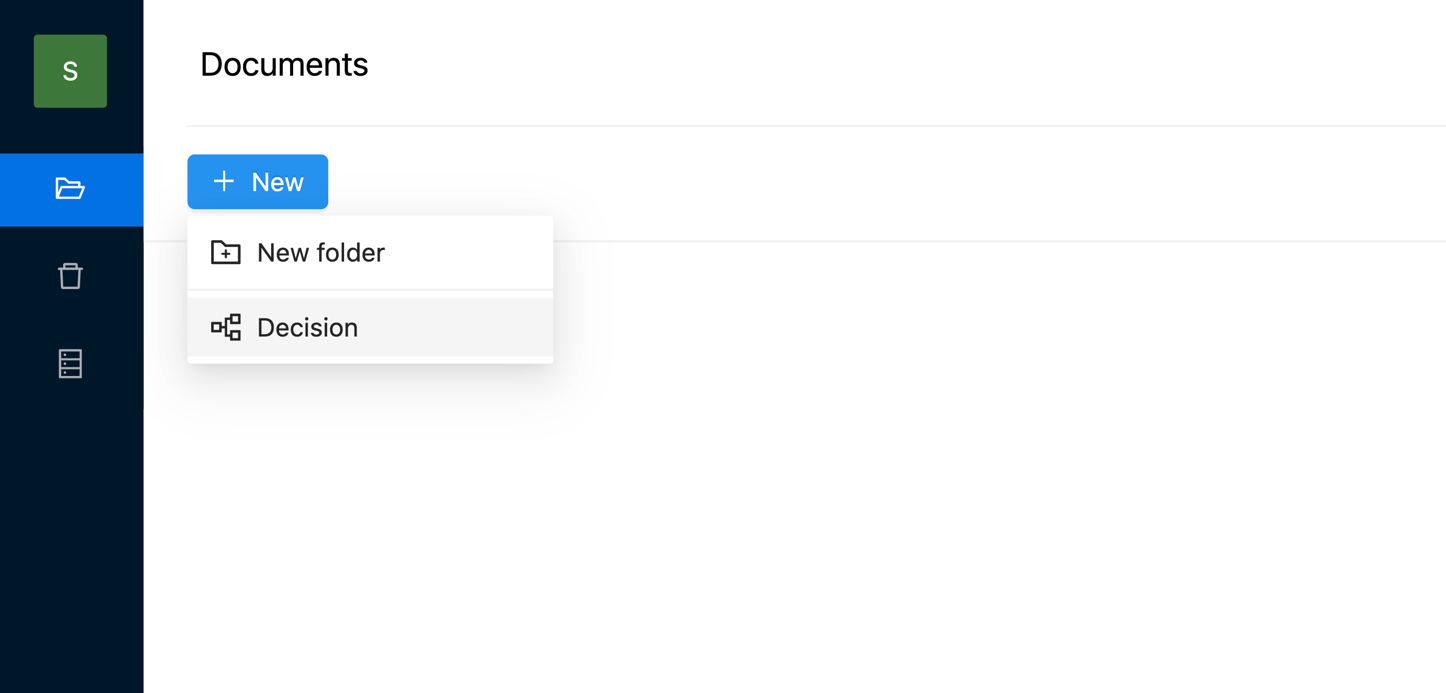
Double-click on the decision document to open it.
Connect the graph
Let's build a simple graph which uses required nodes (input and output) and a decision table.
To start editing the graph press Edit graph in the top right corner. Drag the components from the right side and connect edges until you create a graph like the one below.
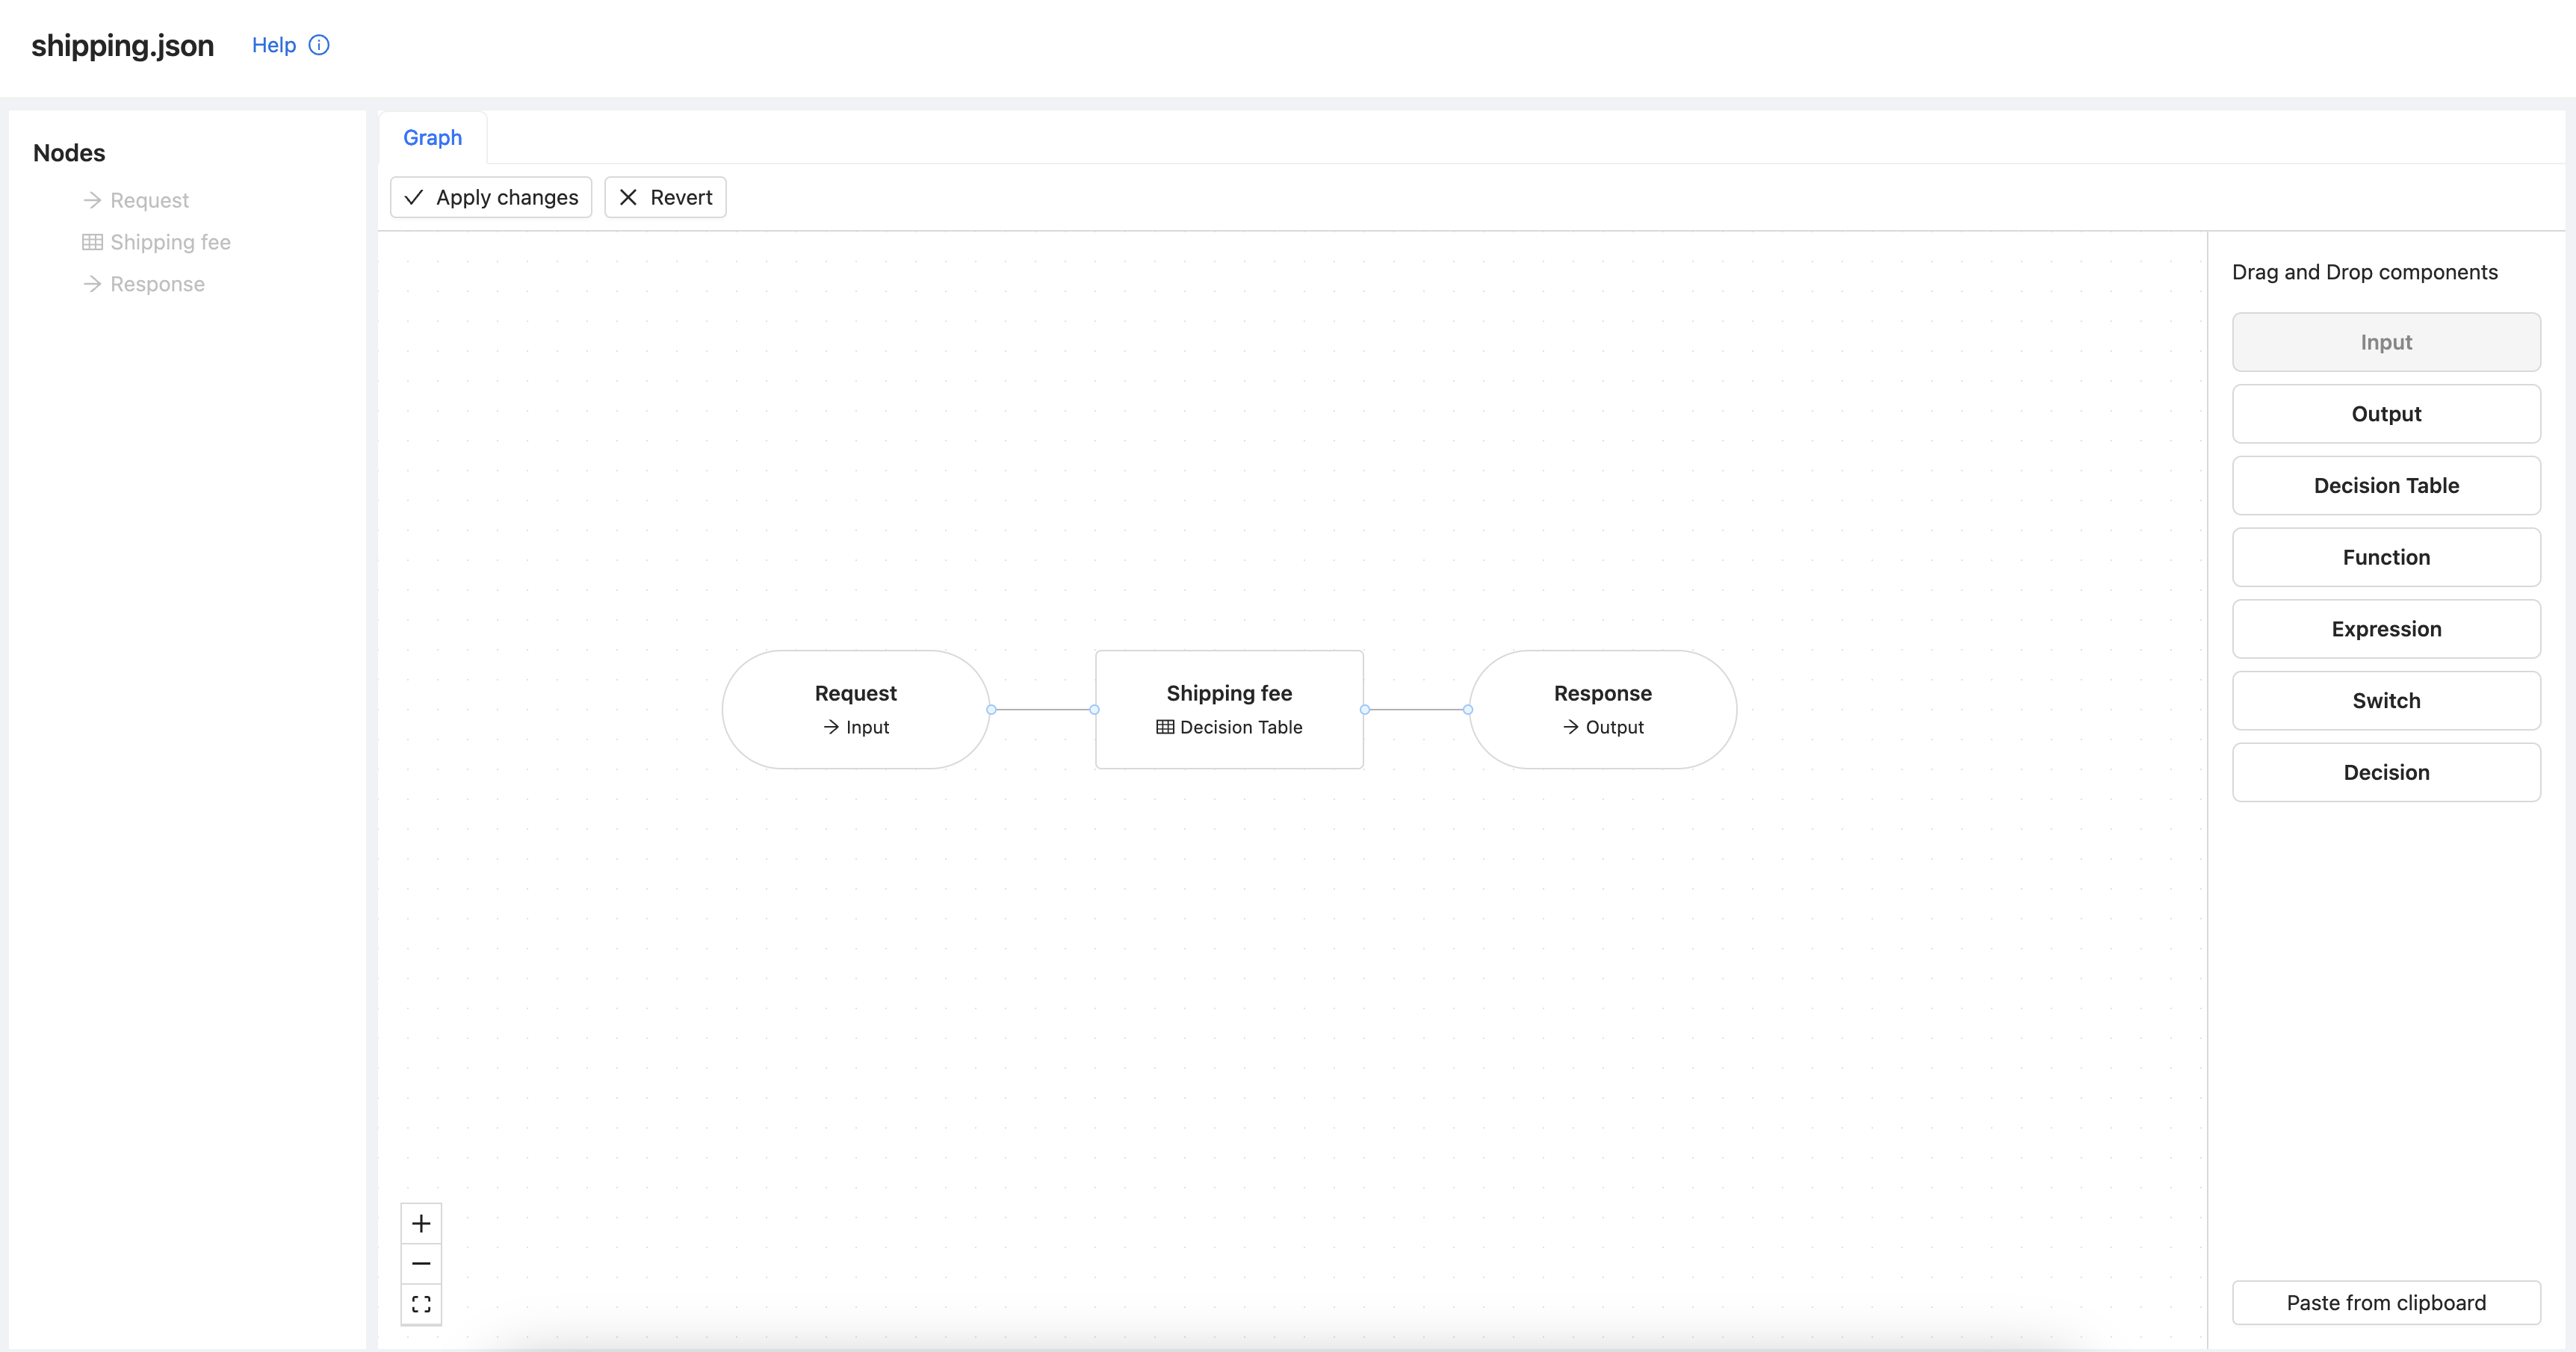
Press Confirm in the top right corner to apply your changes.
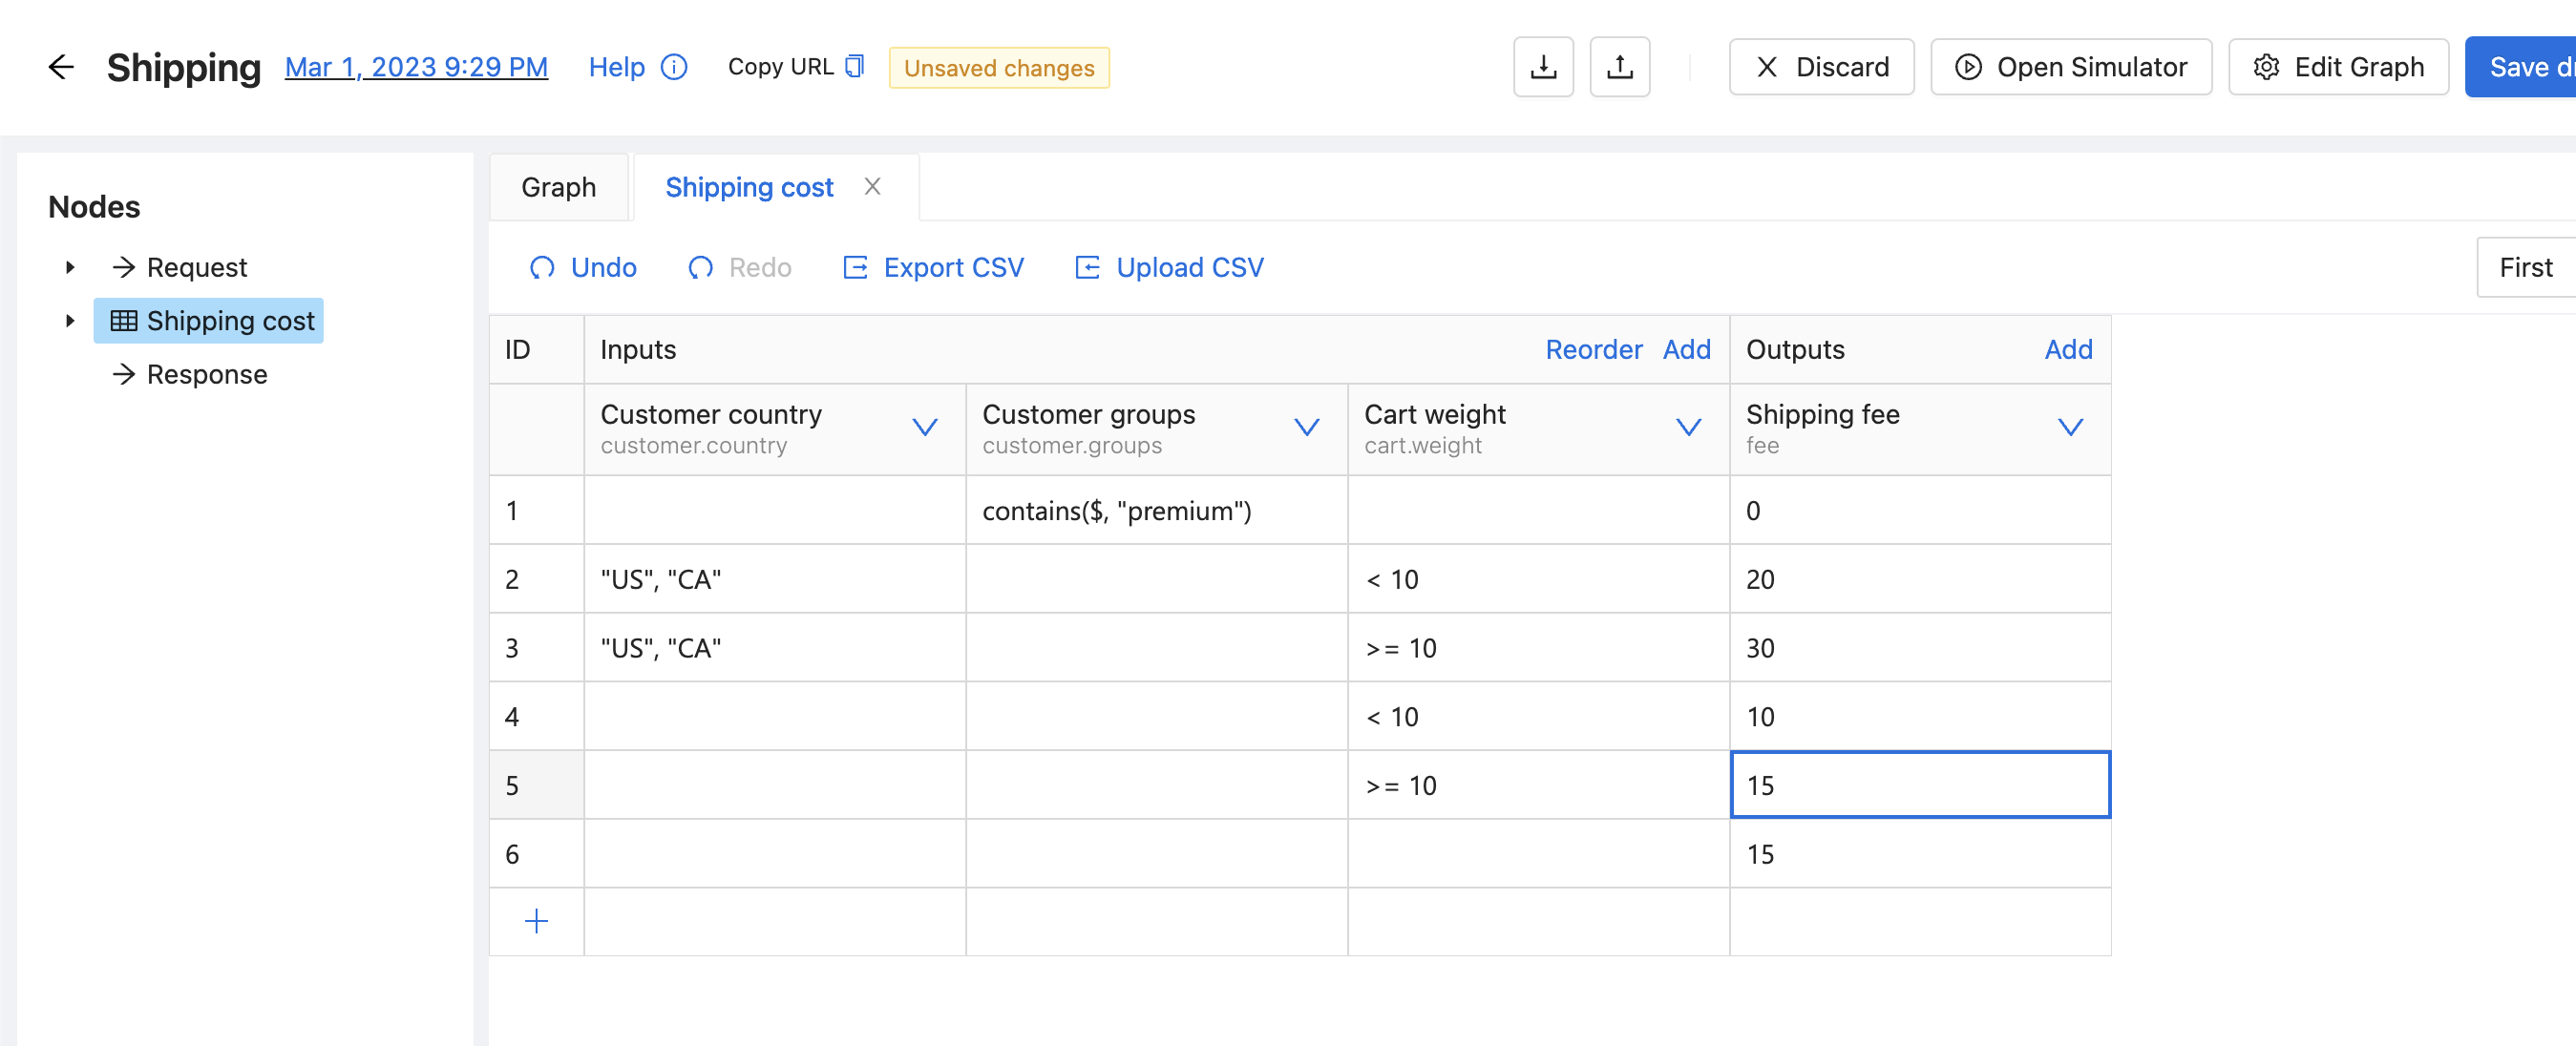
Edit the decision table
Decision tables allow you to create a set of conditions in a spreadsheet format. They consist of inputs and outputs. Both inputs and outputs consist of two data points:
- Label - Helps you describe what the field is supposed to represent
- Field - Selector that utilises ZEN expressions
Add fields and rows to create a decision table with the same structure as below:
You can use short-cuts to quickly navigate through the spreadsheet (arrow keys) and macros. To see a full list of available shortcuts, right-click on any cell in the spreadsheet.
The reference operator ($) is also used in the table. Passing it as a first argument in contains function allows
us to check if one of the groups which customer belongs to is called "premium". Meaning that "premium" customers will
receive free shipping!
The purpose of the last row is to have a default value in case no other rows match.
Save and publish the changes by clicking the Save and publish button.
Simulate
You can simulate a decision even when the content is unsaved. This allows you to experiment and test before saving the changes.
Click on Open simulator button from the decision to show the panel on the right.
The panel consists of request and response. In the request write the following JSON:
{
  "customer": {
    "country": "US",
    "groups": ["premium", "early-bird"]
  },
  "cart": {
    "weight": 10
  }
}
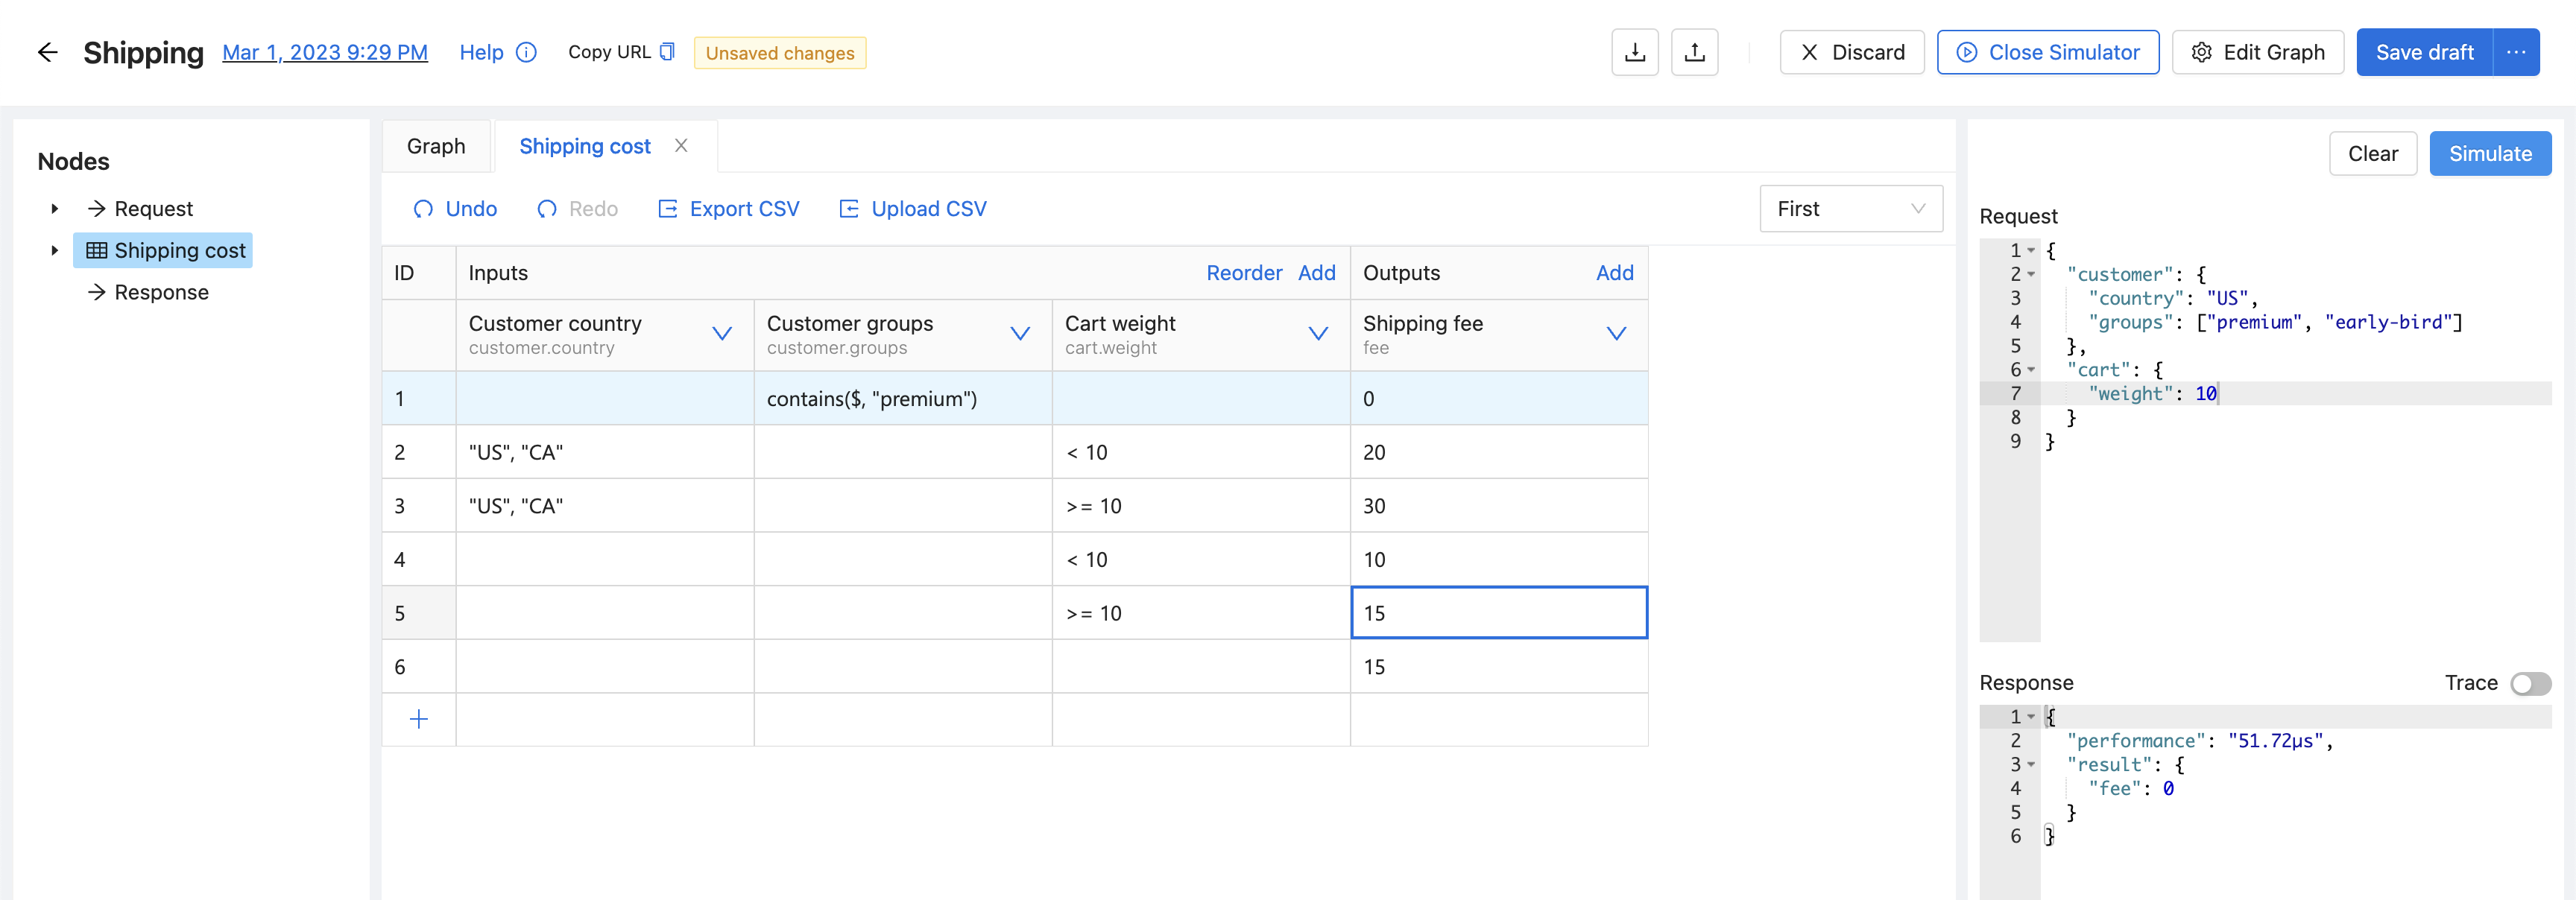
The decision correctly matches the provided input, and premium customers will enjoy free-cost shipping.
Next
Learn how to build decision model