Building Python Rules Engine: Lambda and S3
Learn how to deploy and utilize a serverless rules engine.

In today's world, businesses need to be agile, flexible, and efficient to stay competitive. To achieve this, they need to implement technologies that allow them to process and analyze data quickly and accurately. One technology that has gained popularity in recent years is the serverless computing model.
Serverless computing allows developers to write and run code without having to worry about managing servers or infrastructure. This model is cost-effective, and scalable, and reduces the time it takes to deploy code to production.
In this article we will learn how to:
- Create an Amazon S3 bucket
- Create Rules Engine Lambda Function
- Create a JDM file
- Test Lambda
We will start by assuming you already have AWS Account.
Create an Amazon S3 bucket
To create a new bucket login into your AWS Console and go to the link: https://s3.console.aws.amazon.com/s3/buckets
Next, press Create on the right side.

In the forms enter a unique bucket name and select your region.
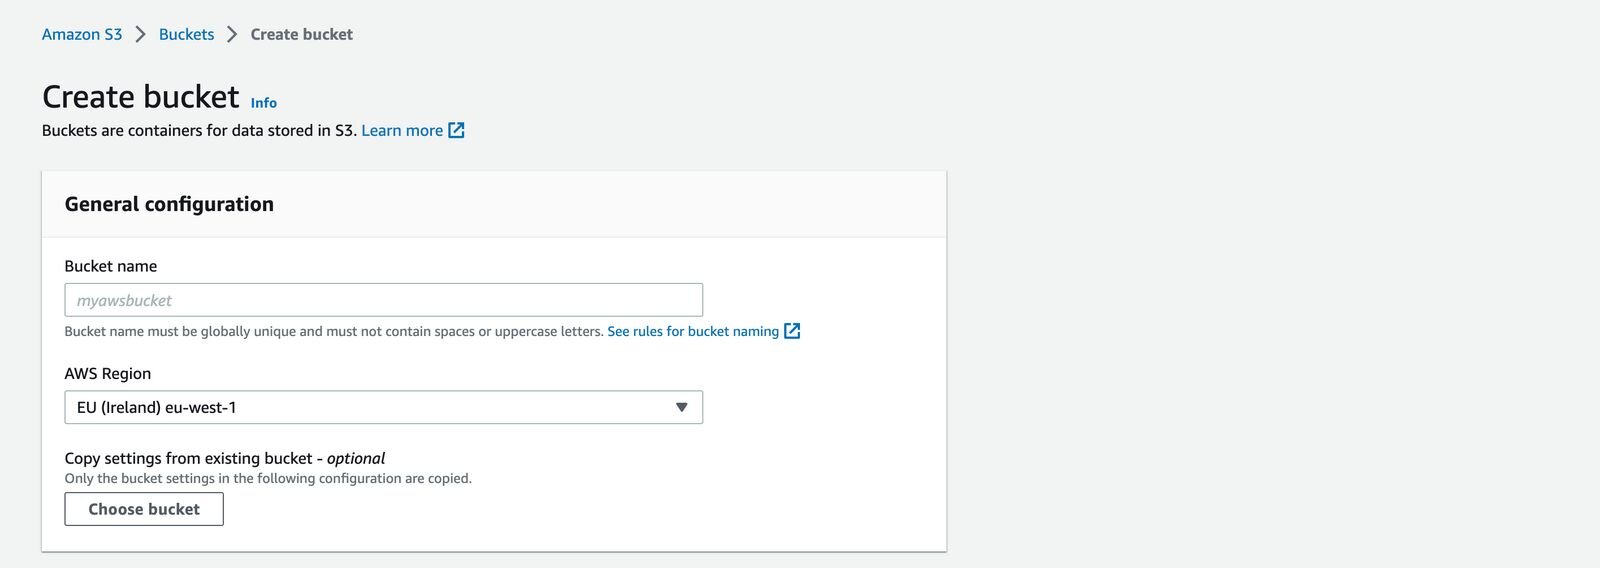
Scroll to the bottom, leave other fields as default and press Create Bucket.
After finishing you should see your new bucket in the list.

We have set up AWS S3 Bucket!
Create Rules Engine Lambda Function
Now, we will create a new Lambda Function and will attach Zen Engine Layer.
To use a Zen Engine in a Lambda environment we have two options:
- Bundle Zen Engine dependency with the Python program,
- Add Zen Engine Layer that has a built-in dependency.
The lambda layer is a smart way to package the dependencies and libraries that simplify serverless deployment. The layer is actually a zip file that contains all the dependencies. It shrinks down the size of the deployment package and makes your deployment more robust. In the next part, we will progress with this option.
Create Layer
To start, open the Lambda service by visiting the Lambda Home page https://console.aws.amazon.com/lambda/home#/layers.
You will see a list of your available layers.

Press Create Layer and you will see the form as on an image:
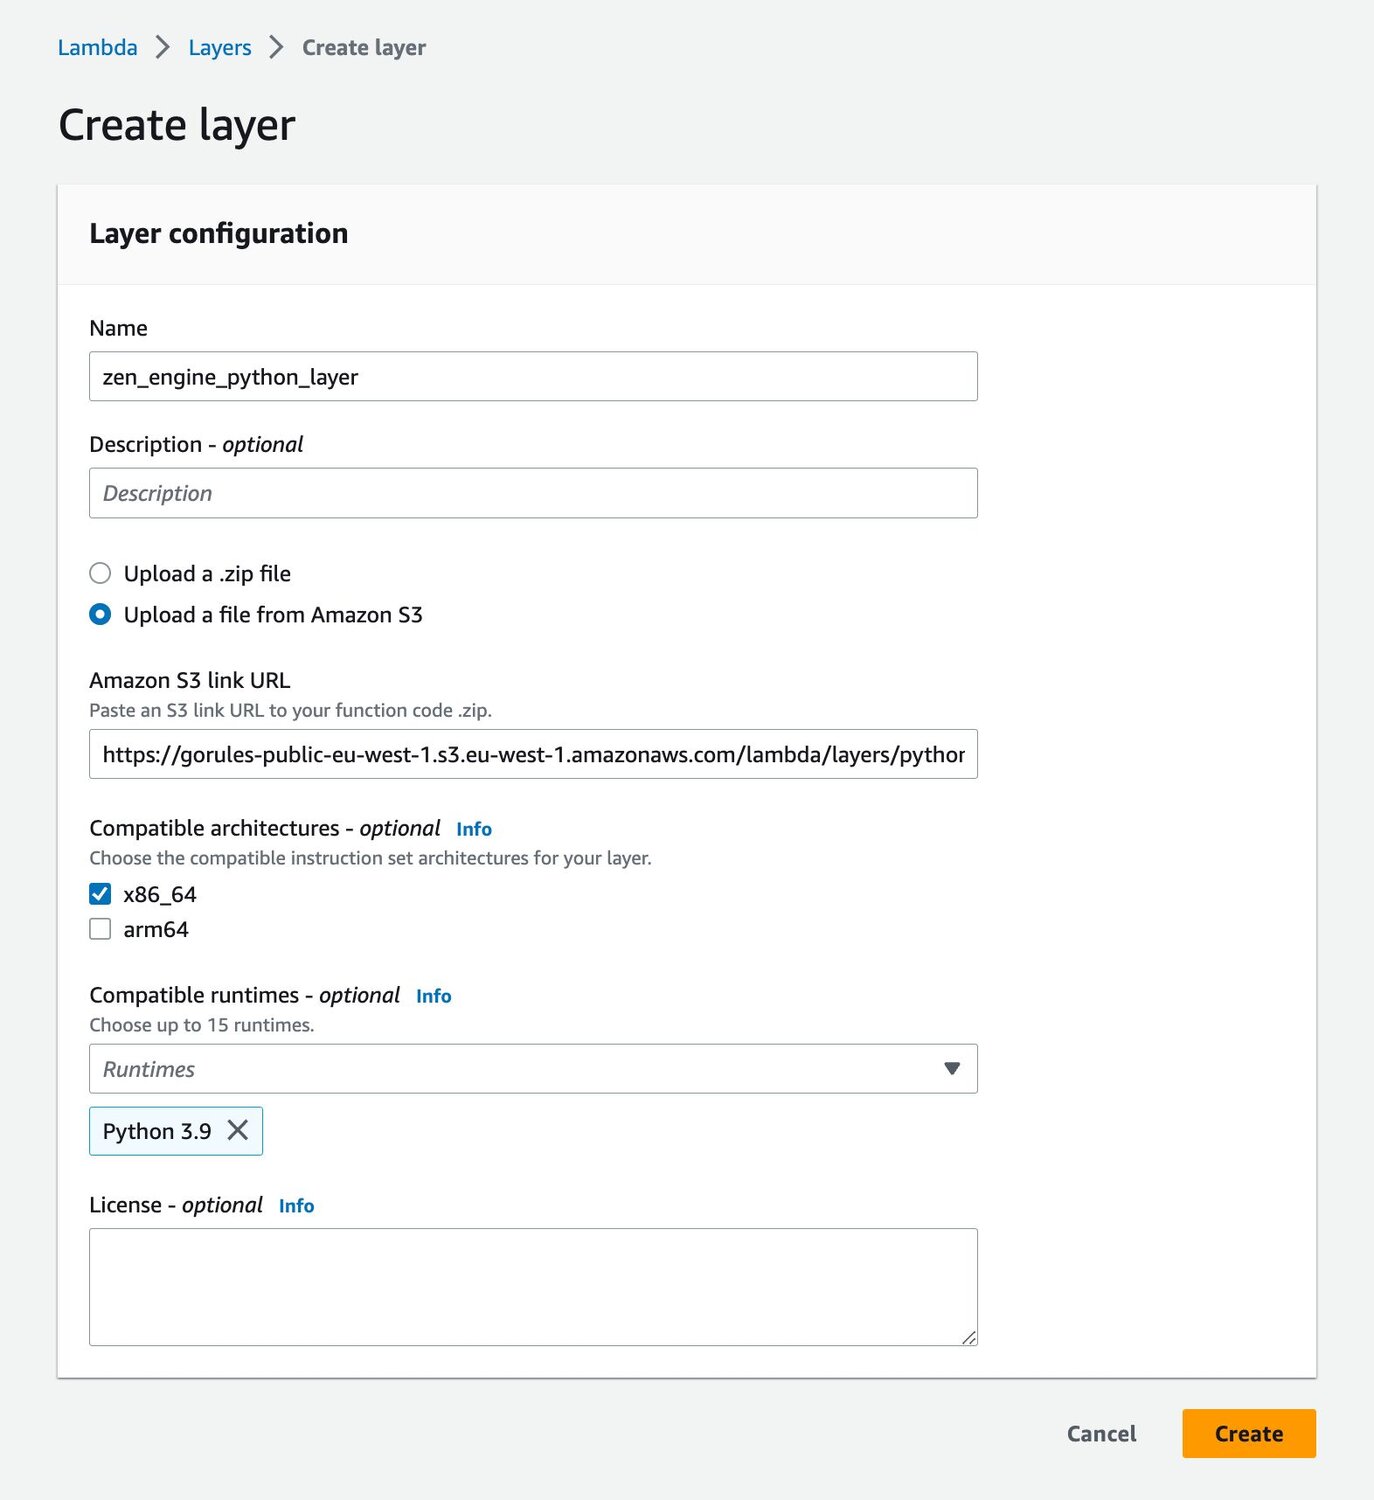
On the form, we will need to add certain configurations:
- enter a name, for example, zen_engine_python_layer,
- tick Upload a file from Amazon S3 and paste this URL: https://gorules-public-eu-west-1.s3.eu-west-1.amazonaws.com/lambda/layers/python/python-zen_engine-v0.4.1-x86_64-linux-gnu.zip
- select runtime Python 3.9,
- tick only x86_64 architecture
You can also download a zen engine python layer to your machine and manually upload it.
Press Create and your Lambda layer will be created.

Create a Function and attach Layer
Next, we will need to create a Function and attach Layer.
On the left side of Navigation select Functions and a new page will appear with a list of available functions.

To create a new function select Create function.
Next, on the configuration page:
- enter the name of your function,
- select Runtime to Python 3.9,
- select x86_64 architecture.
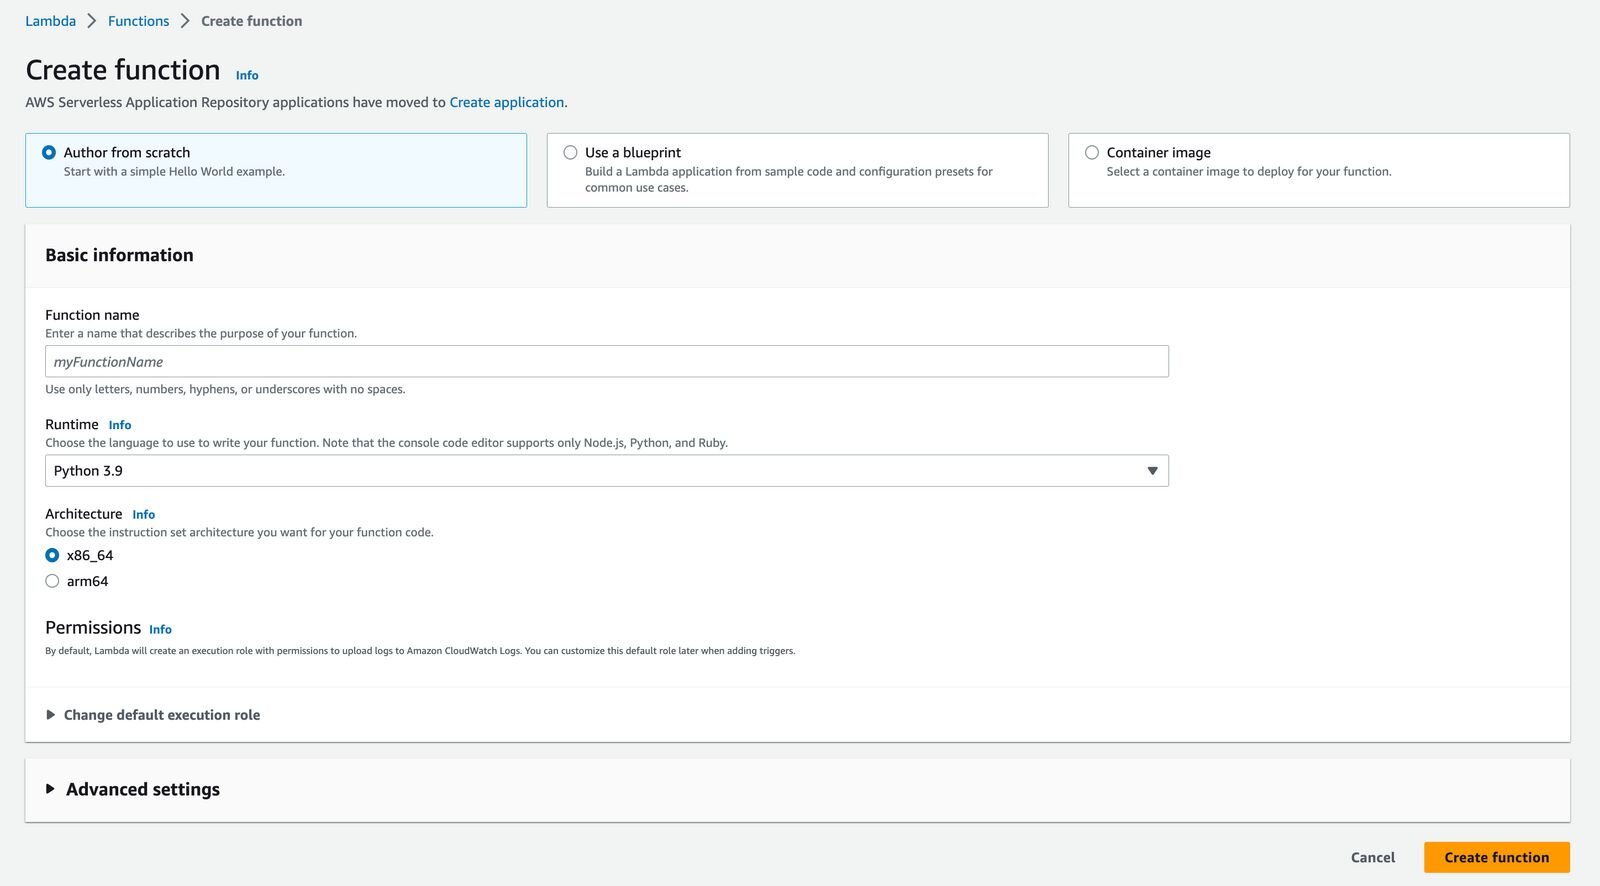
Your Runtime and Architecture must match with the previously created Layer.
Next press Create Function and your Lambda Function will be created!
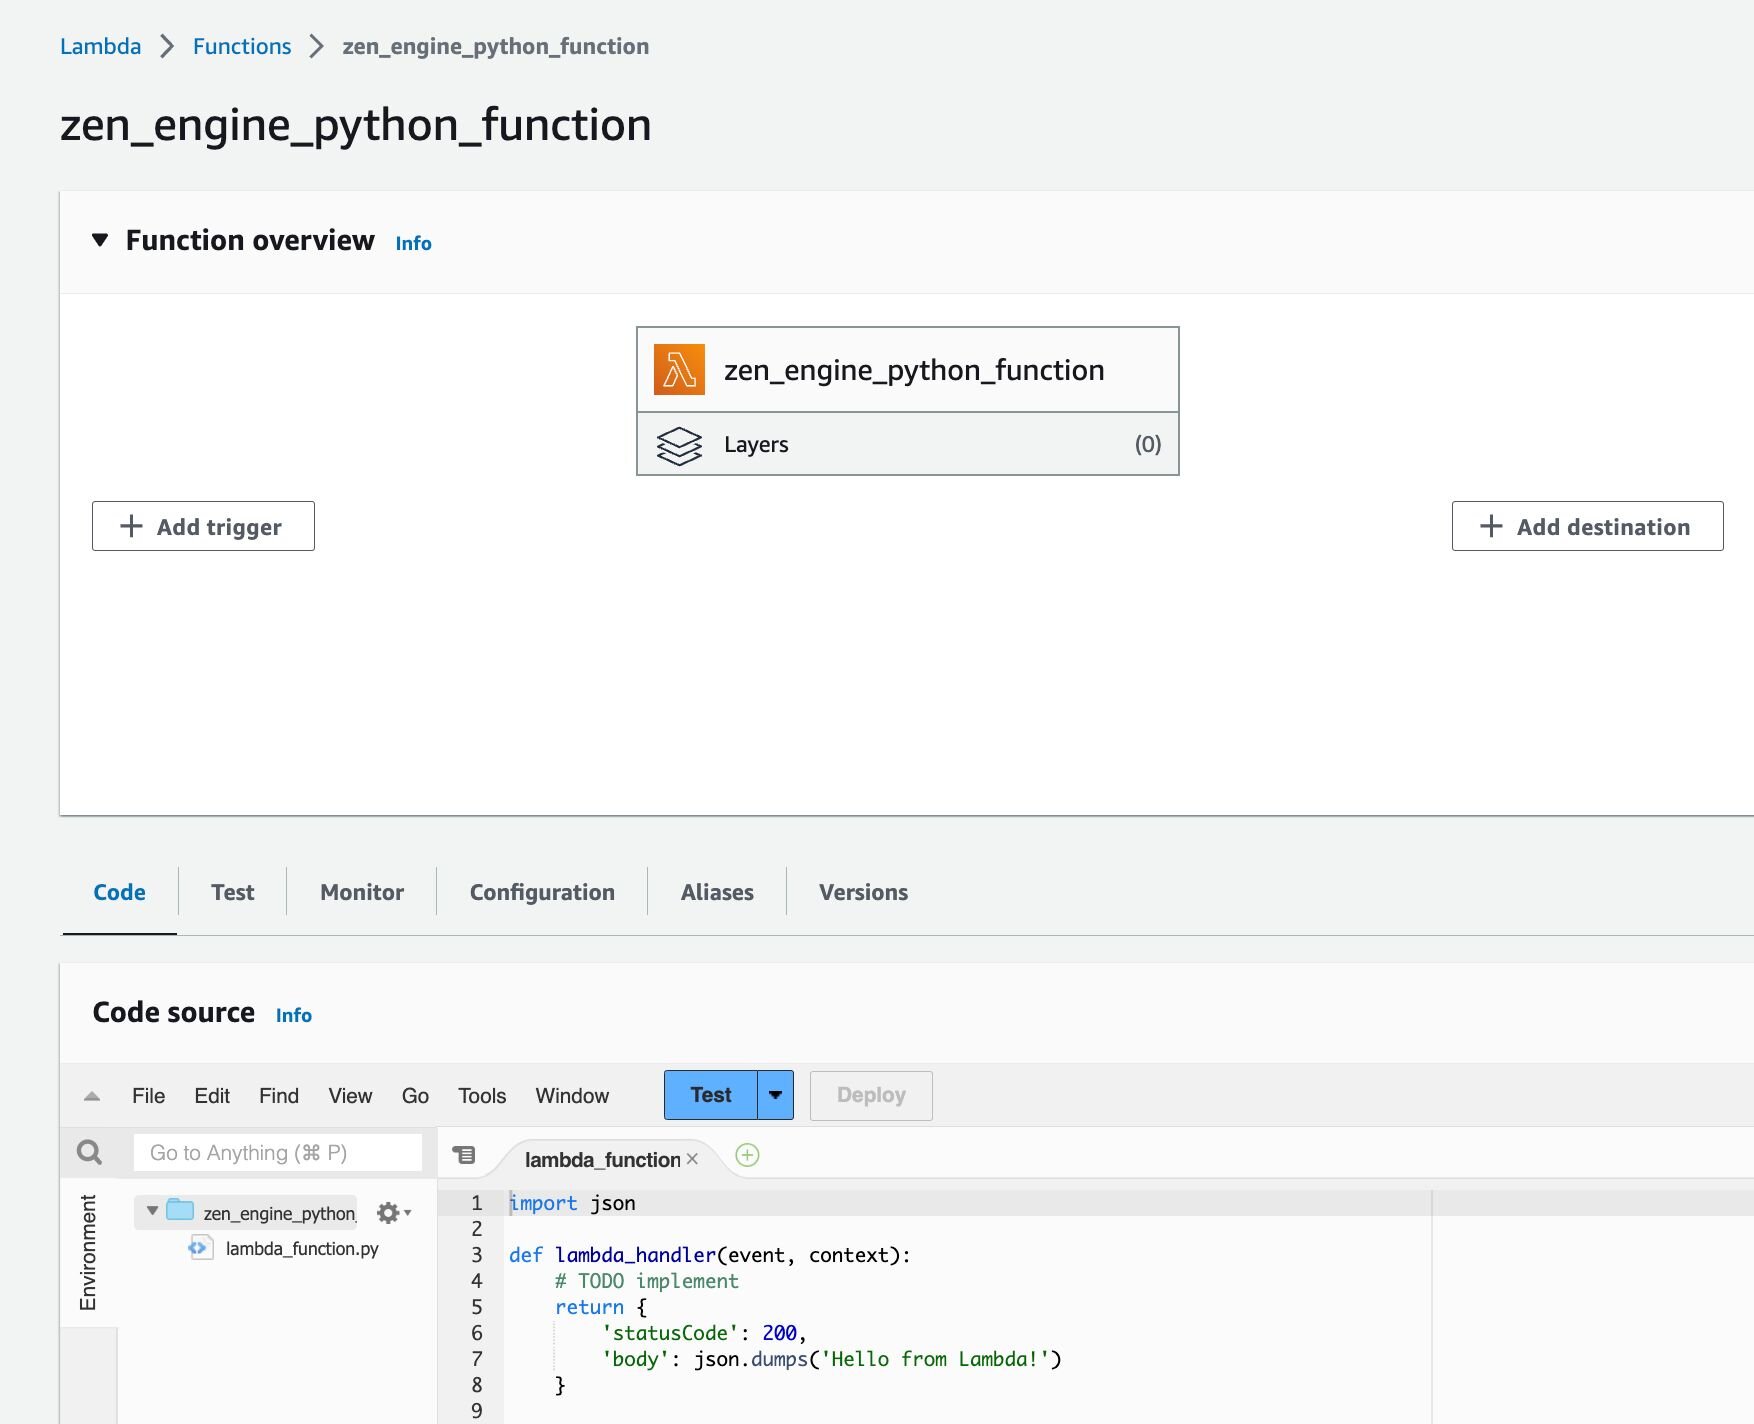
Now we will need to attach our reusable Layer with built-in dependencies. On the Lambda page scroll to the bottom and in the Layers section press Add a Layer.

The new form will appear:
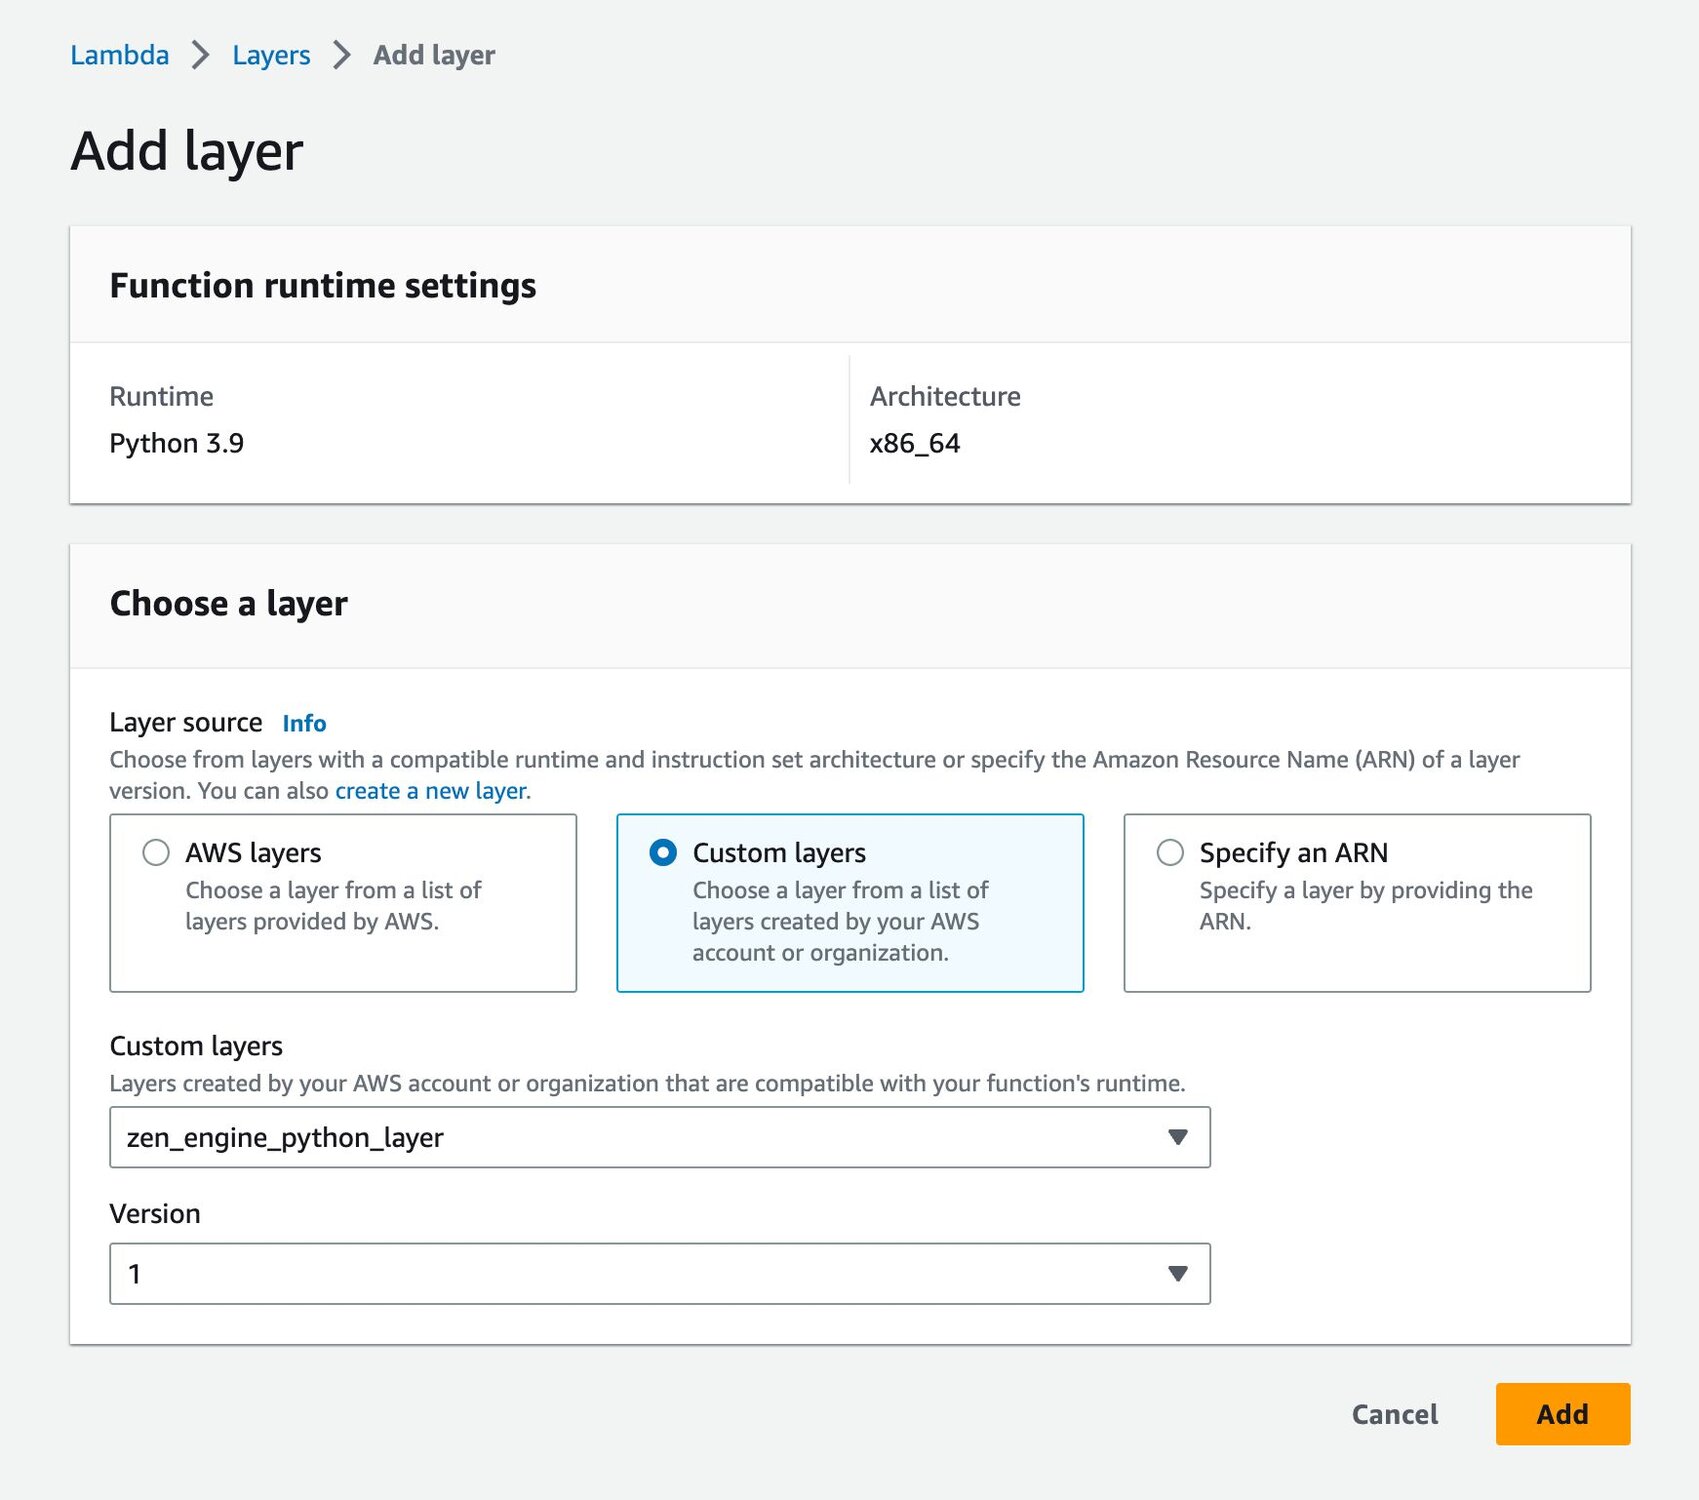
On the form select Custom Layers, from the dropdown select your previously created layer (e.g. zen_engine_python_layer), and select a version. Press Add and your new Layer will be added to your Lambda Function.
Your Lambda will now have a Layer with dependencies attached.
Configure permissions
Next, we will need to allow Lambda to access S3. To do this go to a Configuration Tab, open the Permissions side menu, and press Edit.

On the newly opened form scroll to the bottom and tick Create a new role from AWS policy templates in the Execution role section.
Enter a new name, for example, bre_python_lambda, and in the Policy Template search and select Amazon S3 object read-only permissions.
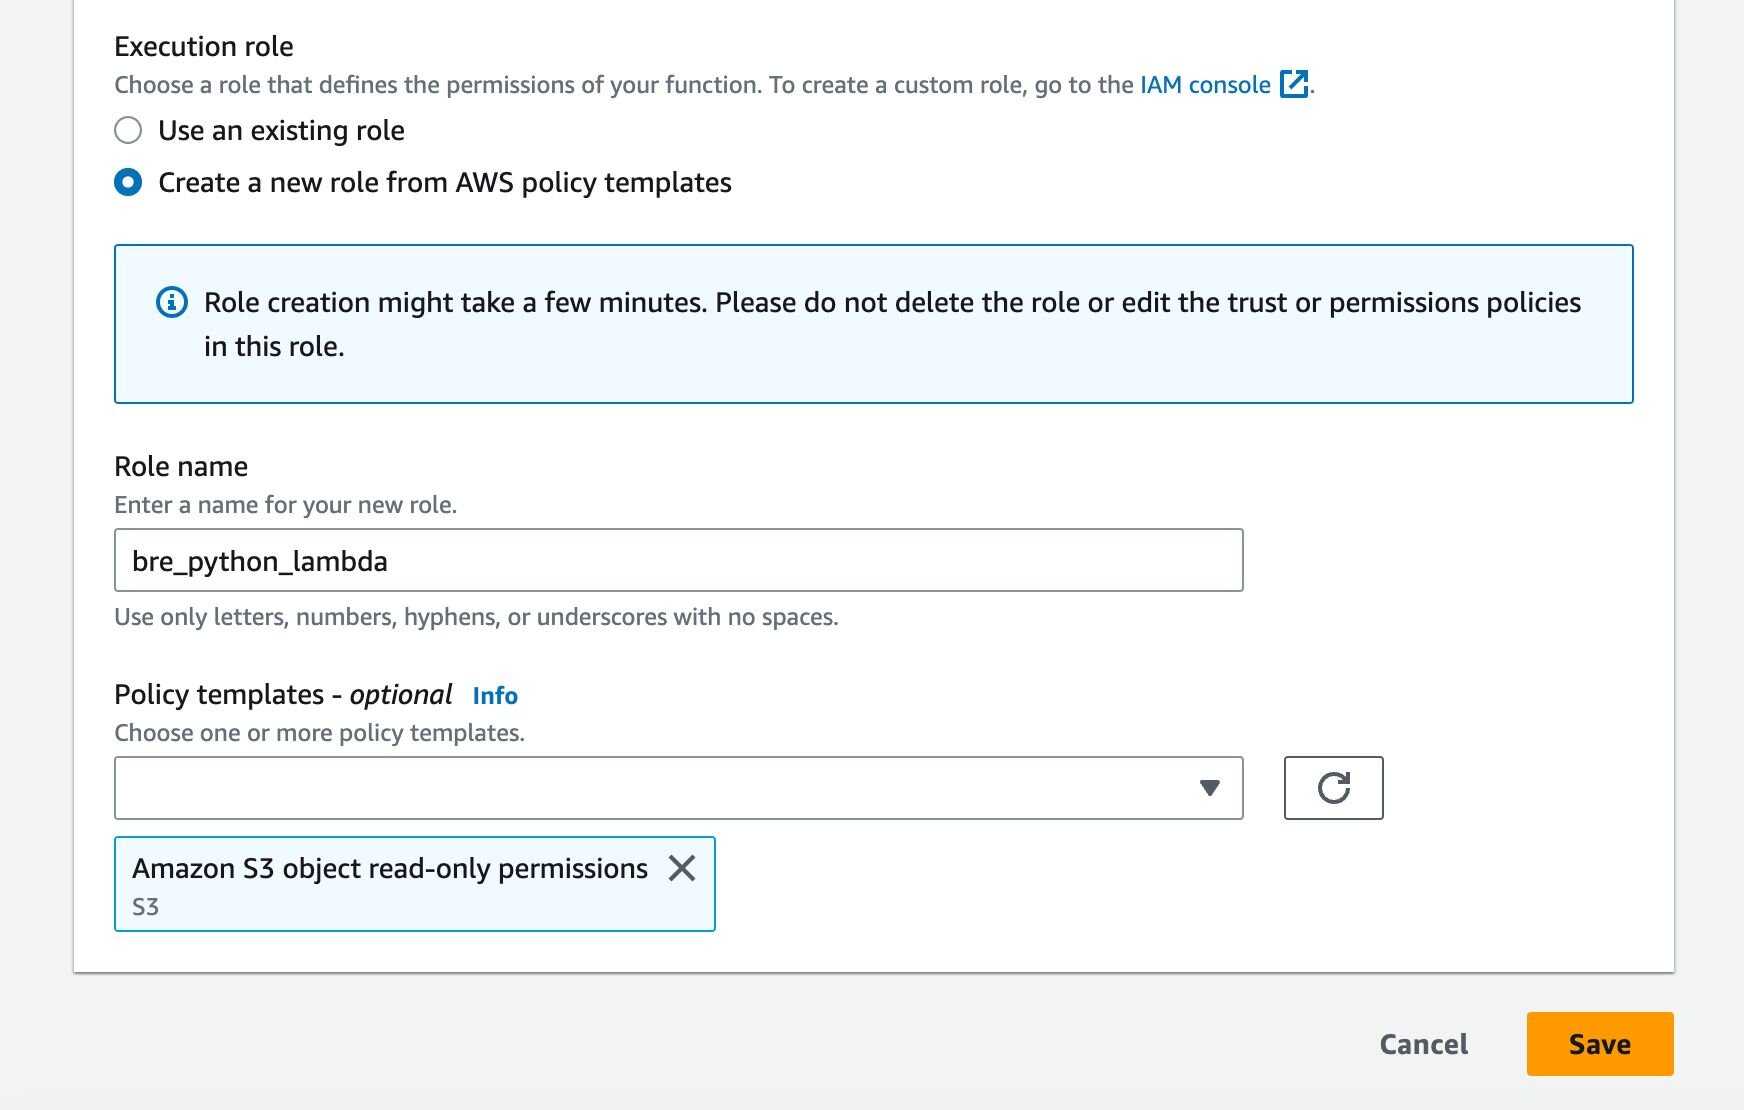
Press Save and your new Role will be added to Lambda.
Python Rules Engine
As we have all dependencies and permissions set, we are now left with writing Python code.
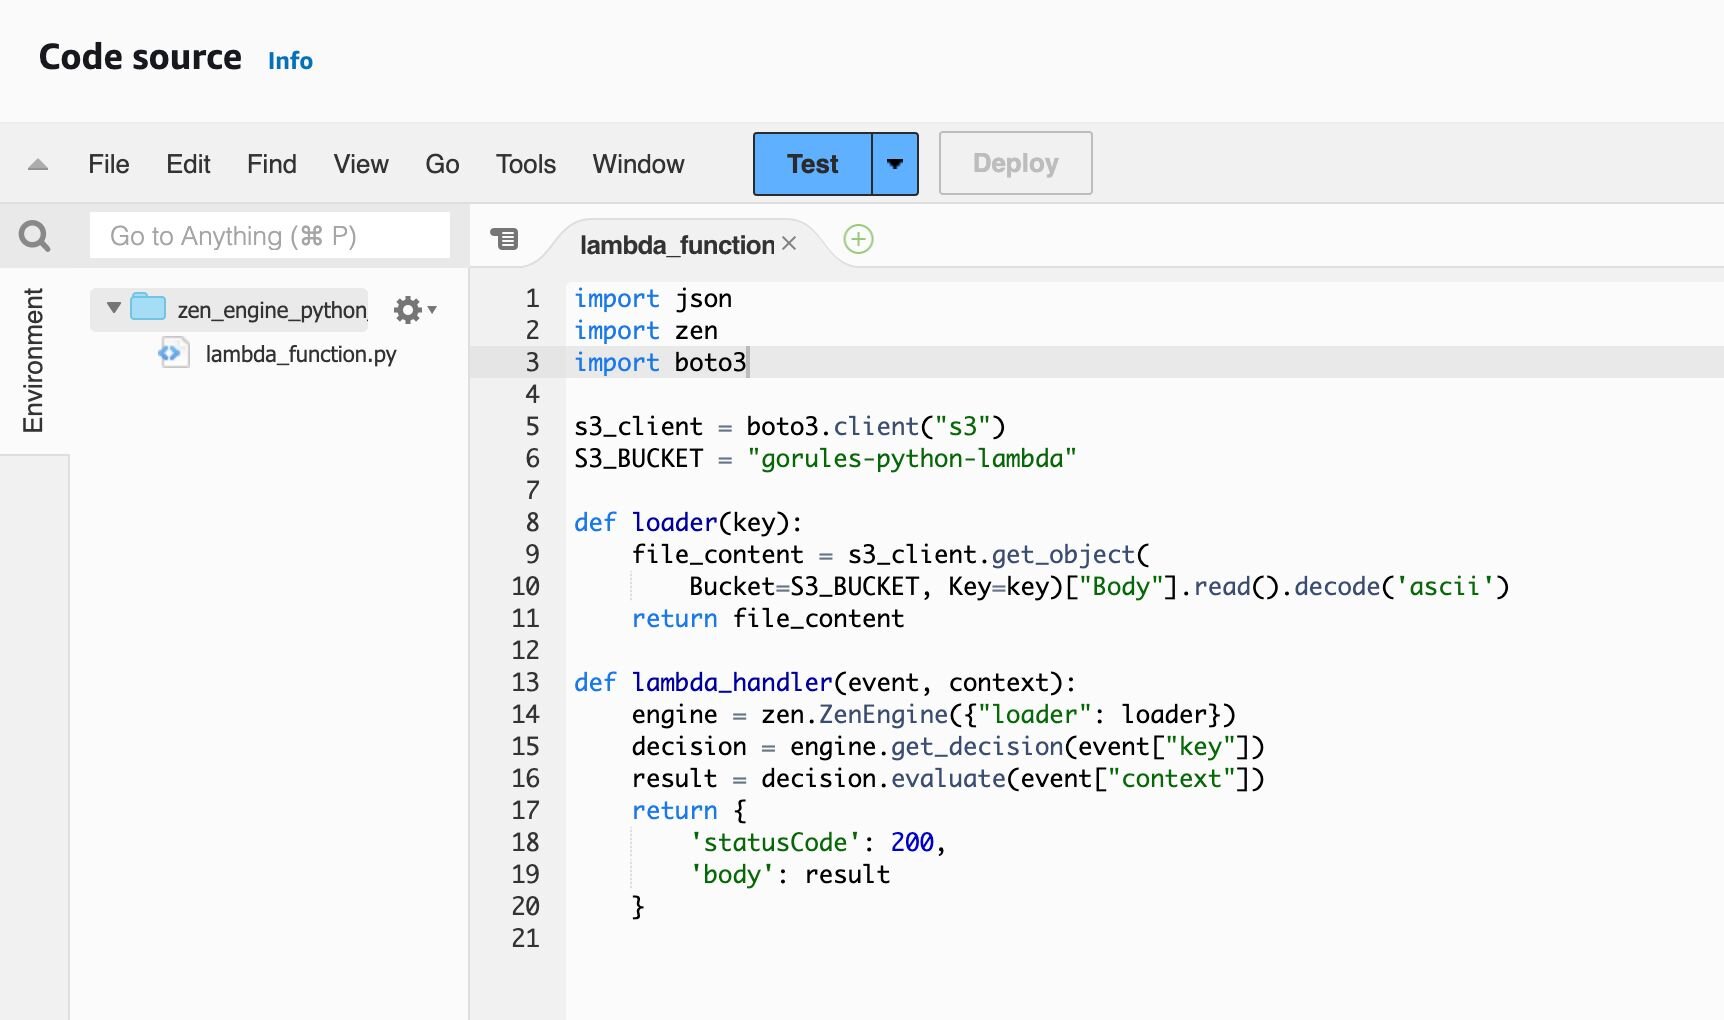
For the source code please visit: https://github.com/gorules/zen/blob/master/examples/python-lambda-s3/lambda_function.py
Because we have added a lambda layer we are able to import the zen library without having any dependency directly in the function.
The code that you are seeing here is using the loaders logic which is made to read decision files directly from Amazon S3 based on a key property of the request.
Create a JDM file
To create and manage decision files we can either create JSON files manually or use GoRules free editor.
Open the editor by clicking on the Editor. The link is loaded with the pre-defined template for the basic evaluation of shipping fees. To learn more about JDM Graphs please visit JSON Decision Model (JDM) documentation. You can also open the decision table by clicking the Open link in the Fees node of the graph.
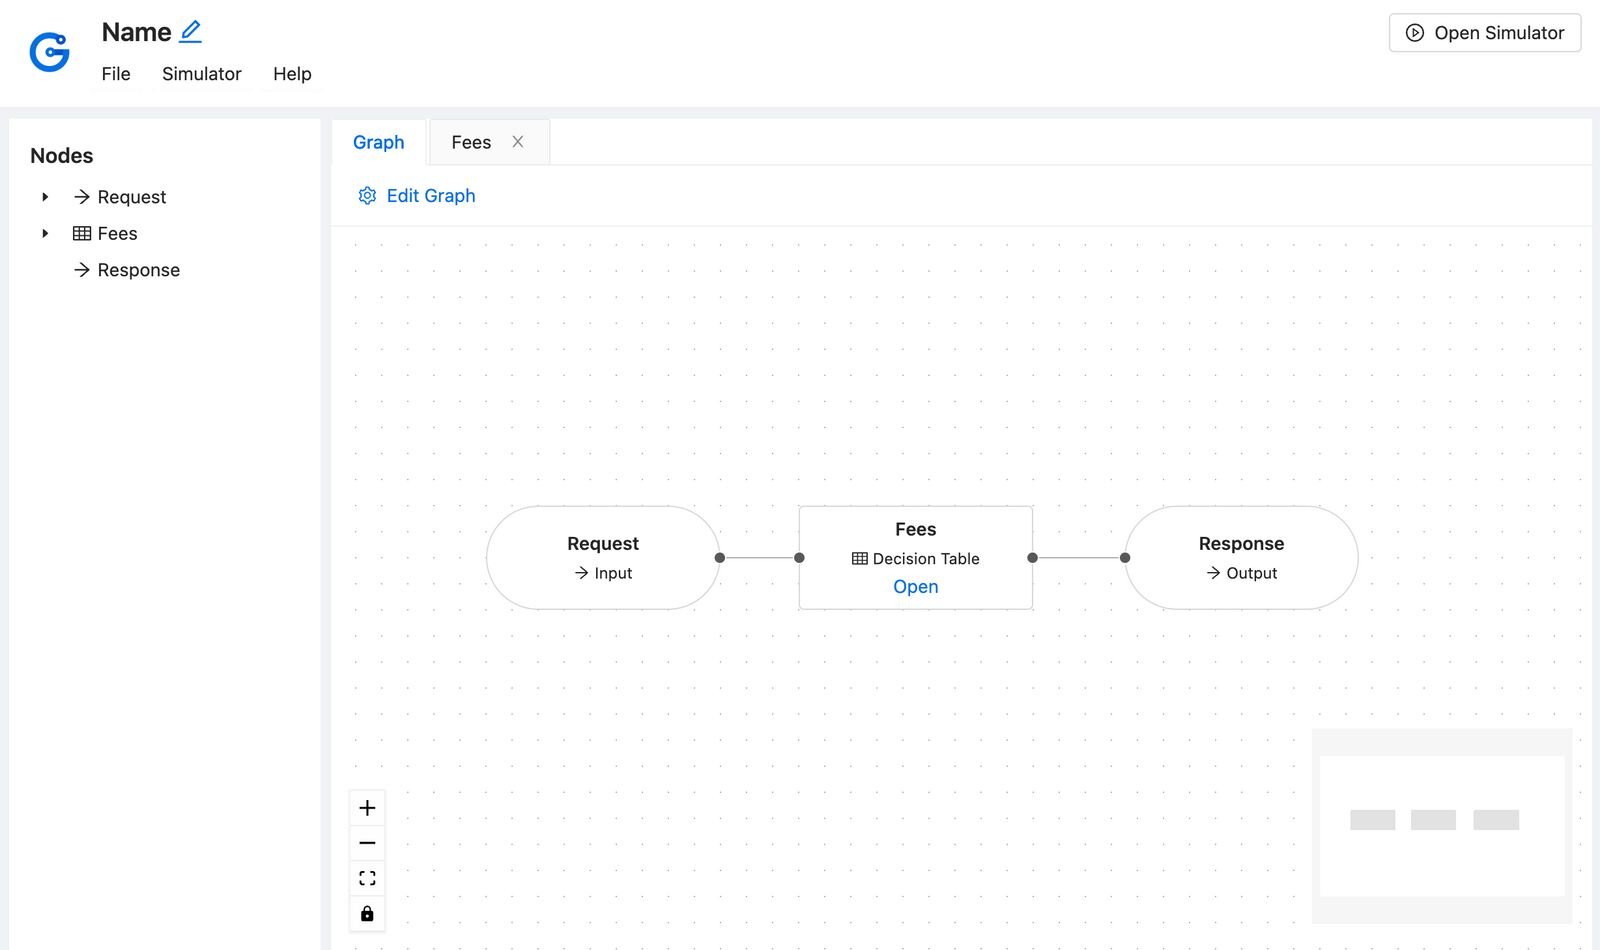
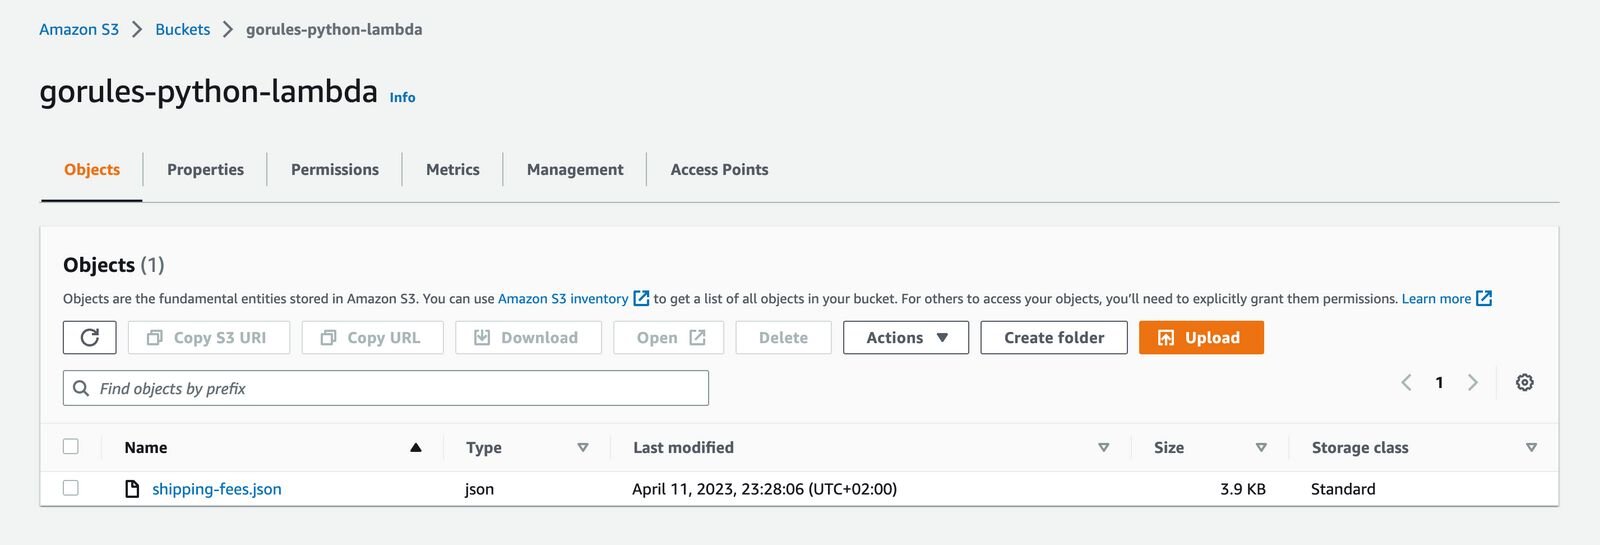
Next, download a JSON file by pressing File > Download JSON and rename a file to shipping-fees.json.
Upload a decision file to your S3 bucket.
Test Rules Engine
Now, we only need to test the Lambda function! Go back to your Lambda Function and press Test.

A new dialog will appear prompting the configuration of the test events. Select Create a new event, name it to test, and for the event JSON paste:

The key is the file name that we have uploaded to our Amazon S3 bucket and Context is input data that will be validated in the rules engine.
After saving a new test event press Test again. You can finally see a result.
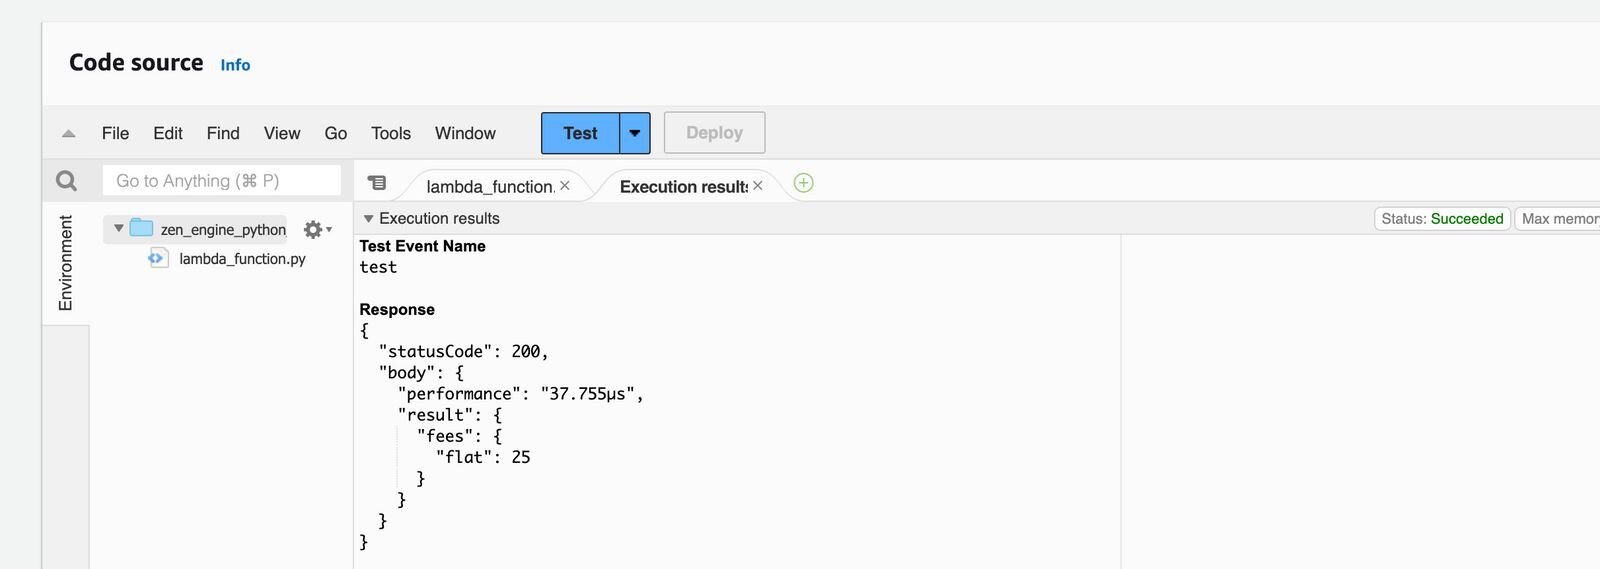
Likewise, you are able to upload many different decision files and execute them by naming a Key in the JSON event to a new file.
Summary
In this blog, we explored how to build a serverless rules engine using Python and AWS Lambda. We started by creating an Amazon S3 bucket to store our data. Next, we created a Lambda function and attached a Zen Engine layer, which is a pre-built dependency, to our function. This layer helps streamline the deployment process and makes our Lambda function more robust. We also configured permissions to allow the Lambda function to access S3, ensuring that it has read-only access to the necessary objects.
In conclusion, building a Python rules engine with AWS Lambda and S3 can offer numerous benefits for businesses, including increased agility, improved data processing capabilities, and cost savings. By following the steps outlined in this blog, developers can easily set up a serverless rules engine and leverage the power of serverless computing for their business needs.
Reshaping the Insurance Industry with Steadfast Technologies
What is Dynamic Pricing and Why It Matters
